Connecting to your online classes using Google Meet: a guide for students
WE WILL CONTINUE UPDATING THESE INSTRUCTIONS AS NEW INFORMATION & PRACTICES BECOME KNOWN. Watch for "NEW! (Date)" flags to appear in the text below.
Getting yourself mentally ready
We haven’t done much “online teaching and learning” at Whitman, let alone on a large scale. Perhaps you’ve never done anything like this at all. Please try not to worry too much. There will be some bumps on the road you are traveling, but remember that we are all on the road together, and as such, we are expecting bumps. We should collectively grant ourselves grace. Whitman will do its level best to support you in your efforts, and remember that your professors and fellow students can also act as resources. Google searches for tips, tricks, and troubleshooting can also be very helpful. If you learn something cool, please do share it with Technology Services, canvas_help@whitman.edu and others in the Whitman community-- you’ll be helping all of us when you do.
Breathe.
Here we go…
Definitions
Remote student/professor-- a student or professor who is connecting to a class, office hours, or other meeting through the internet instead of in person.
where you see this icon, you'll find step-by-step instructions on how to perform specific tasks on your computer or online classroom. Reading just these How To’s is not necessarily a substitute for reading this entire document.
Getting ready before class
What you will need to have ready before joining the class
A computer with a built-in camera OR a computer and a webcam. (Tablet or smartphone will also work, and installing the “Google Hangouts Meet” app is helpful. Note that you don’t want the “Hangout” app-- that’s different!) Don’t have any of these? Per President Murray’s email on March 12, 2020, if do not have access to a computer or tablet, please reach out to the Dean of Students’ office.
A must: headphones, preferably with a built-in mic.
A high speed internet connection: From the physical place where you will be attempting to join your online class, can you easily watch, with minimal or no stalling or really bad image quality loss, YouTube, Netflix, or other streaming service on your computer, tablet, or smartphone? If so, this place will very likely allow for a good/great connection to your online class. If not, find another place OR let your professor know that you may need to join the class by phone (see how to later on this page). Additionally, per President Murray’s email on March 12, 2020, if do not have access to high speed internet, please reach out to the Dean of Students’ office.
Firefox or Chrome. Safari is possible, but not recommended. Edge or Explorer are out-- don’t use them.
A quiet environment from where you can join the online class. If at all possible avoid joining from a coffee shop or other places where there are lots of people and visual and aural noises happening around you.
Patience. It will take you a couple times to feel comfortable doing this.
Get your gear set up:
With the above materials in hand:
Connect your headphones to your computer or other device.
If you’re using a webcam instead of a built-in camera, plug the webcam into your computer.
Test: Listen to music, watch YouTube or something to make sure you can hear audio through your headphones adequately. If it’s not working, try the following:
Unplug and re-plug your headphones,
Restart the app you were using to listen to audio
Restart your computer, tablet, or smartphone.
If none of this worked, and you still can’t hear anything, call the Help Desk (509)-527-4976. Or try googling for the problem.
4. Test: An excellent way to test your camera and microphone connection is:![]() On a computer
On a computer
Sign in to https://whitmail.whitman.edu.
Open a new browser tab or window
Go to https://meet.google.com (even if your online class will not be in Google Meet.)
Click on “Join or Start a Meeting”
Click “Continue”
You’ll be asked some questions about allowing Meet to access your camera and your microphone. Allow this to happen.
If you see a video of yourself, your video feed is working! If not, try the following:
If your computer has any physical object (cover, piece of tape, etc) over the lens, make sure it’s been opened or removed.
You are likely staring at a black rectangle on the web page. In the bottom middle of that black rectangle you should see a circular camera icon. Make sure it’s not red. If it is, click it
In the bottom right of the black rectangle are three vertical dots. Click that and choose “Settings.”
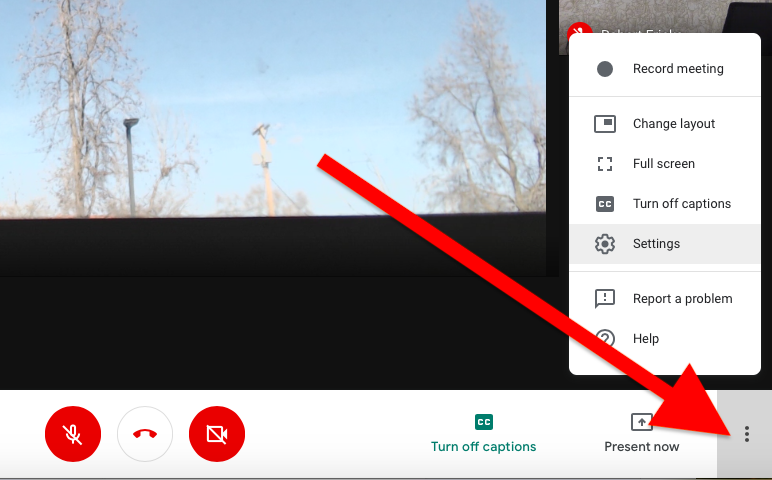
Click the “Video” tab. Under “Camera,” make sure there’s a camera selected there. It might say something like “HD Camera” or “Built-in camera.”
Click “Done.”
If none of the above worked, call the Help Desk (509)-527-4976.
Speak a sentence or two. As you do, you should see in the lower left hand corner of your video you should see three small vertical lines that bounce around as you speak. If you see that, your audio is working! If not, try the following:
You are likely staring at a black rectangle on the web page. In the bottom middle of that black rectangle you should see a circular microphone icon. Make sure it’s not red. If it is, click it. Try speaking again.
In the bottom right of the black rectangle are three vertical dots. Click that and choose “Settings.”
Click the “Audio” tab. Under “Microphone,” make sure there’s a microphone selected there. It might say something like “Built-in microphone” or “webcam microphone.”
Click “Done.”
If none of the above worked, call the HelpDesk (509)-527-4976.
Close the Google Meet browser window.
![]() On a tablet or smartphone:
On a tablet or smartphone:
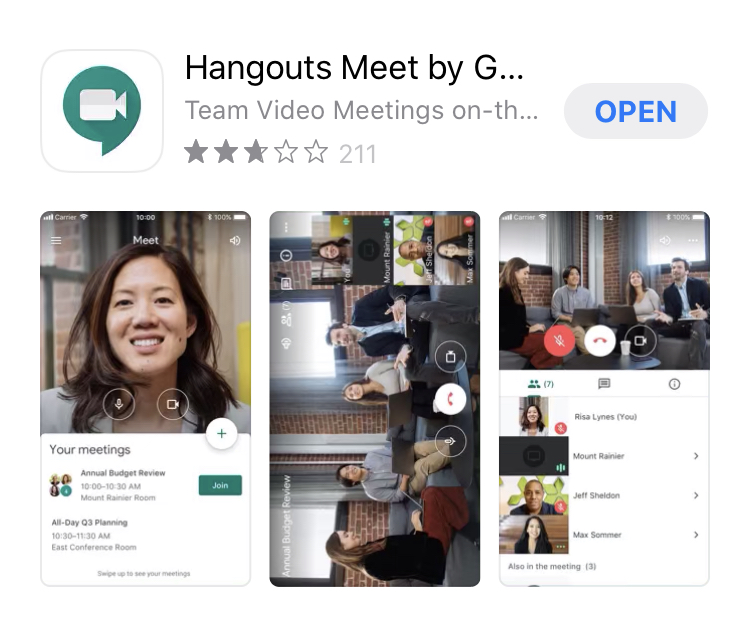
If you don’t already have it, get the Google Hangout Meets app (Note: not the “Hangout” app-- that’s different!) from the Apple App Store (iPhones/iPads) or Google Play (Android devices).
Open the Google Hangout Meets app. If it’s your first time using this, you will be asked to allow the app to use your camera and microphone. Allow that. You may be asked to sign in to your WhitMail account.
Tap “New meeting” (even though you’re not actually going to do that), and close the “Add others” pop up window.
If you see a video of yourself, your video feed is working! If not, call the Help Desk (509)-527-4976.
Speak a sentence or two. The three green dots next to your username should appear to bounce around as you speak. If you see that, your audio is working! If not, call the Help Desk (509)-527-4976.
End your Meet session by tapping on the video and tapping on the red phone button.
How to join your online class
PLEASE NOTE: At this time, Whitman is standardizing on using Google Meet (formerly Hangouts) as the place where online classes are held. However, some of your professors may use other technologies, like Canvas’ “Conferences,” or Zoom, Facetime, etc. Many of our instructions and tips below apply to Google Meet, BUT many are also generic enough that they can apply to other technologies.
First thing:
Plug in your headphones and put them on.
What do I connect to?
Your professor will send you a link through email, Canvas, or both. If the link comes to your email, it may come in the form of a Google Calendar invite.
What happens when I click on the online class invite link?
![]() On a computer a web page will open. (Note that if it opens in Safari, Edge, or Explorer, you should copy the link and open it in Firefox or Chrome instead).
On a computer a web page will open. (Note that if it opens in Safari, Edge, or Explorer, you should copy the link and open it in Firefox or Chrome instead).
You’ll be asked some questions about allowing Meet to access your camera and your microphone. Allow this to happen.
You should see your video and your mic should be working (per your tests, #3 and #4 in “Get Your Gear Setup (remote students)” above.)
Click the microphone icon so it goes red. You have now muted your audio. As a general rule, you should mute your microphone during class unless you have something to say.
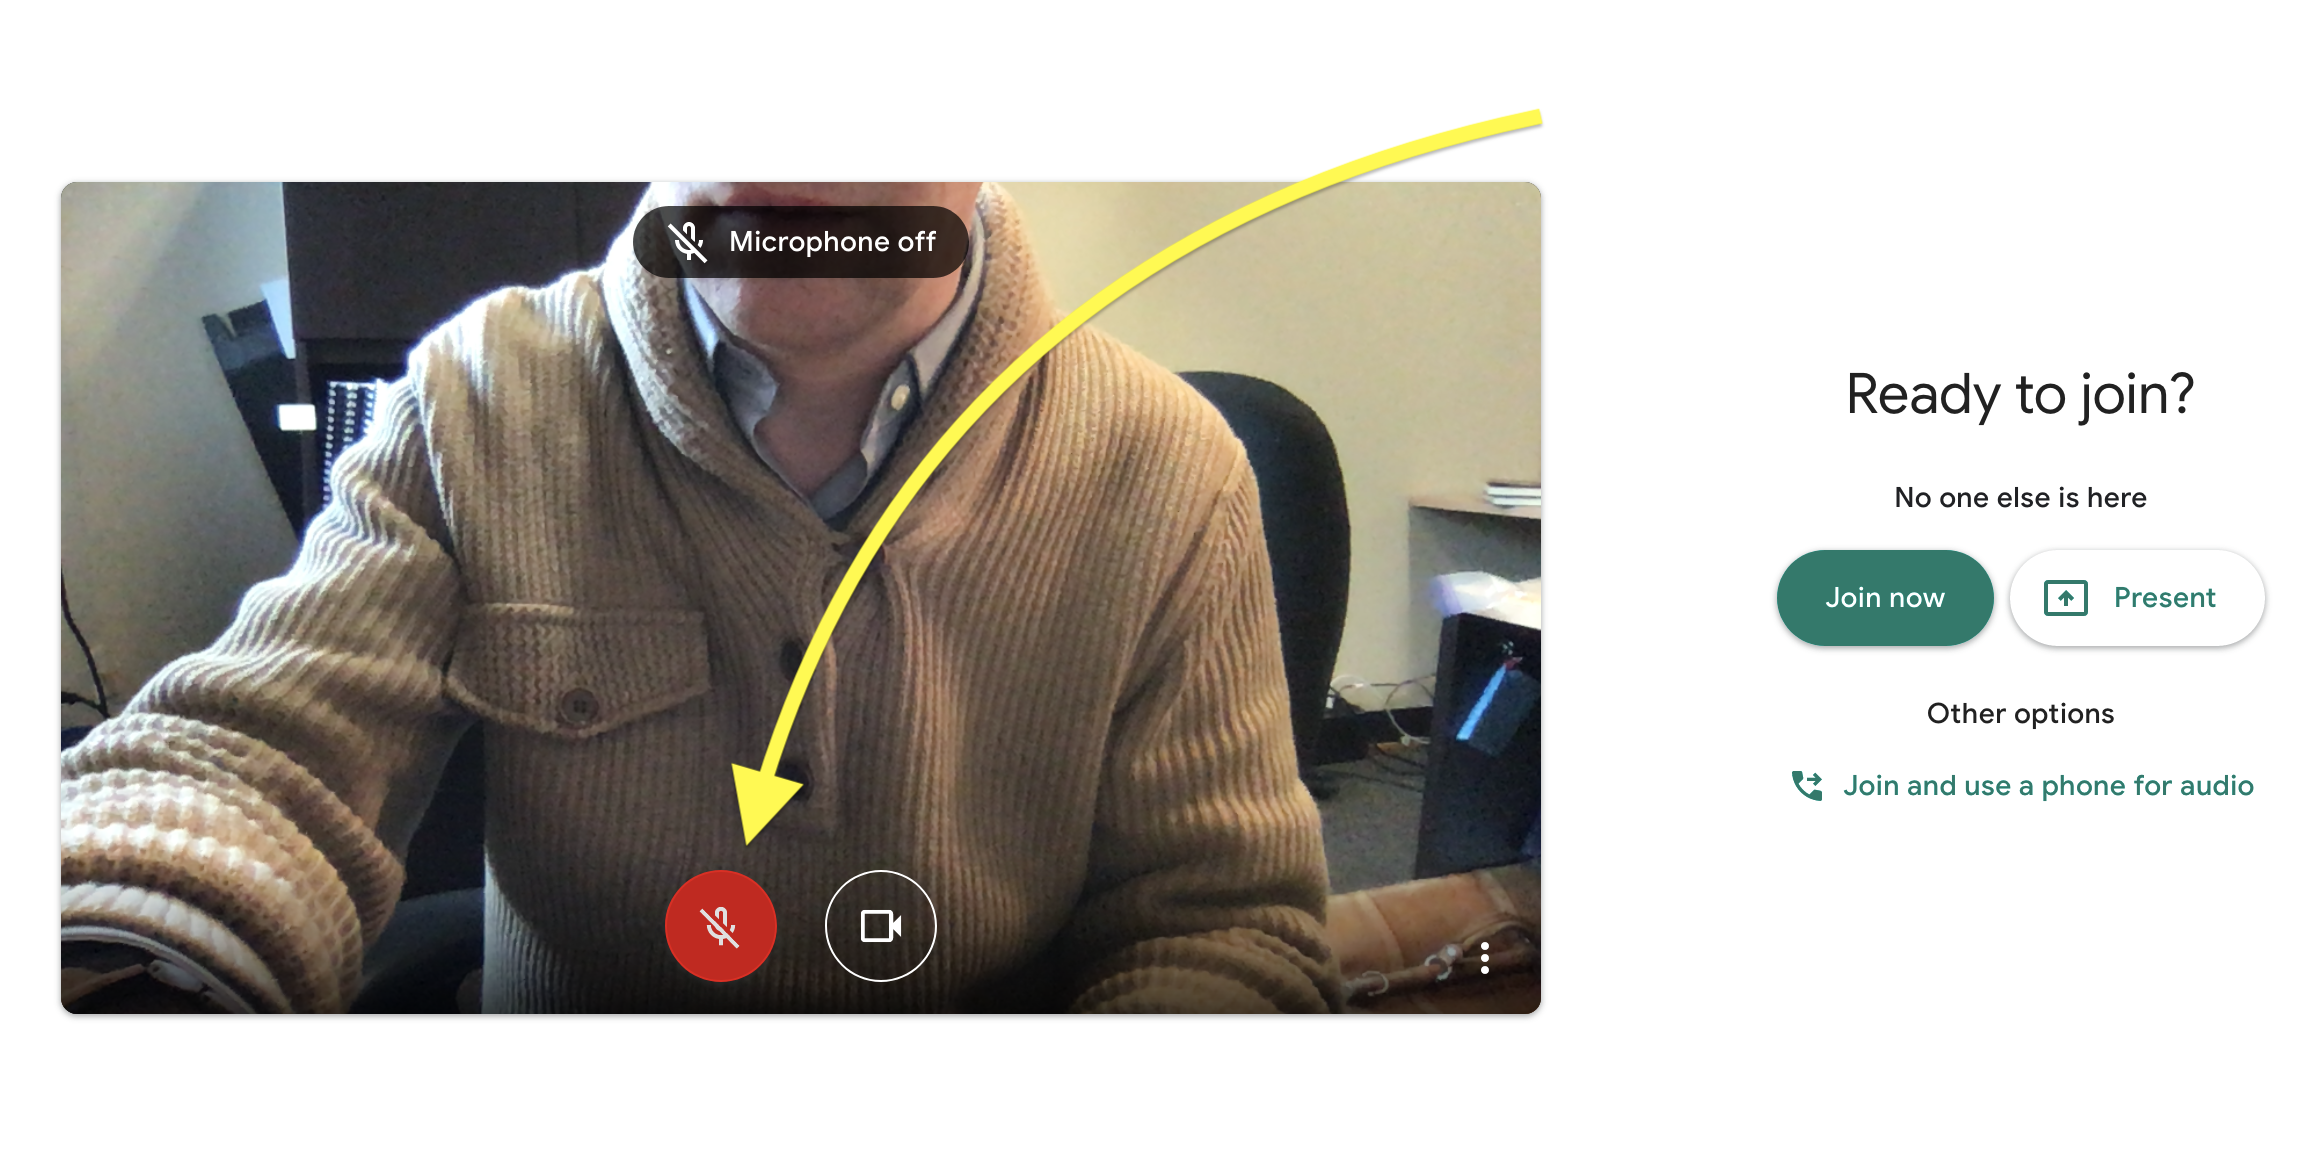
Click “Join Now” (and NOT “Present,” even if that’s what you intend to do).
You’re in!
![]() On a tablet or smartphone:
On a tablet or smartphone:
Clicking on the link should take you directly into your Google Hangouts Meet App, or prompt you to download the app.
You should see your video and your mic should be working (per your tests, #3 and #4 in “Get Your Gear Setup (remote students)” above.)
Click the microphone icon so it goes red. You have now muted your audio. As a general rule, you should mute your microphone during class unless you have something to say.
You’re in!
Now that you’re in class:
How to unmute your audio:
To unmute your microphone, click/tap on the red microphone icon. The red color will disappear, you you are now unmuted. Remember to mute again when you’re done speaking. If you don’t see the microphone icon, move your mouse on the screen or tap your screen and you’ll see it show up along the bottom.
How to un/mute your video:
You may not need to show your face in class. Double check this with your professor.
To un/mute your video, click/tap on the video icon. If you don’t see the video icon, move your mouse on the screen or tap your screen and you’ll see it show up along the bottom.
Chat:
Use the Chat feature as directed by your professor. Remember that all people in this Google Meet session can see the chat.
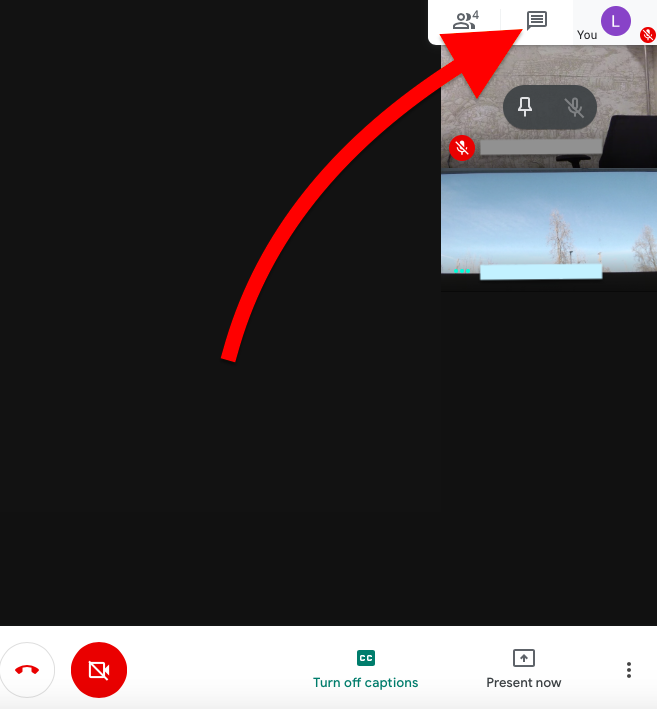
Tip: To make the Chat conceal itself, click/tap anywhere outside the Chat and it will go away.
Closed Captions:
Click the “Turn on Captions” if you wish to see the meeting close captioned. Note that these captions are not perfect, but they’re serviceable.
What am I seeing on my screen? How to change that.
(Computer)If you don’t see a white bar at the bottom of your screen, wave your mouse around so it appears.
Click the three vertical dots at the bottom right of your screen (tablet/smartphone: upper right), and choose “Change Layout.” Choose “Sidebar”-- choosing this will allow for automatic switching to the main area of the screen the video feed of the person that is speaking. On the right side of the screen, you will see small video feeds of the other class participants.
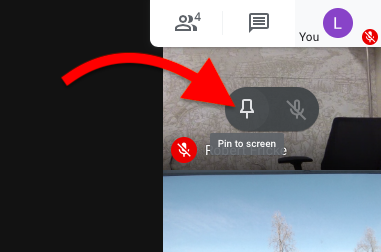
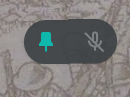
To make anyone or even someone’s Powerpoint presentation occupy the whole browser screen, move your mouse over them and click on the pin icon. To leave this full screen mode, click on the pin again. This is on a computer. On a tablet or smartphone it’s very similar.
How do I get in/out of full screen mode?
On a computer, if you double click on your browser screen (not in the Chat or People area) and you will go completely full screen. Press the Escape key or double click again to get out of this.
Rotate your tablet or smartphone to go in and out of full screen.
Sharing your screen (when you have to do a presentation)
You can choose to share your entire screen or a specific window. Doing so can enable you to show Powerpoint presentations, web pages, etc.
Tip: Audio and/or Video: If you want to show a video or play audio, do not attempt this on the computer that is running Google Meet-- the whole thing will work very poorly if at all. Instead, share links and/or files ahead of class through Google Drive, Canvas, and/or email.
To start sharing your screen once you’ve joined a Google Meet:
Make sure you’re ready:
Powerpoint, Keynote, or Google Slides (in a separate browser window from your Google Meet session) are ready to go full screen)
Web pages, PDFs, or other material are loaded and ready to show.
See the above caution about showing audio and video.
Close any windows or files on your computer that you do not want other people to see-- when you share your screen, whatever you have open may be visible to others in the Google Meet session.
2. Wave your mouse on the screen during a Google Meet session. You may need to click once. From the white bar that appears at the bottom of the screen, click Present now.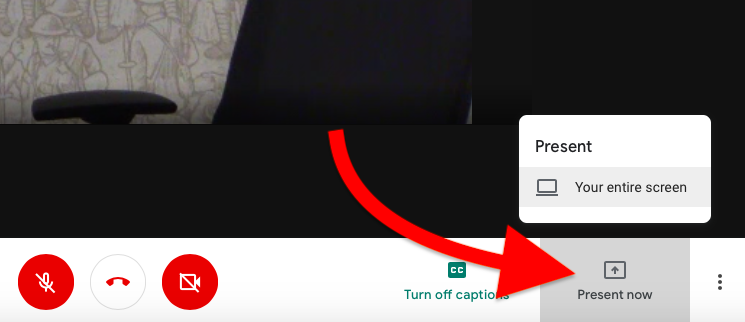
3. A box will pop up with the options to present either your entire screen or a specific window on your computer. (On a Mac, it may only offer “entire screen”)
If you are planning on showing anything “full screen” you must choose “entire screen,” otherwise it may not work in your Google Meet Online Classroom.
You may be prompted to give your web browser permission to share your screen. On a Mac, you may be further prompted to give the browser permission through Apple’s System Preferences. Granting permission is ok, though be aware that your entire screen will be visible to remote students. When you do this (Mac), unfortunately, your browser (and/or app) may have to be restarted.
Now present your on screen material.
To stop presenting:
- If you have a full-screen Powerpoint or other presentation going, end that presentation.
- In your Google Meet screen, click "Stop presenting."
Note: if you cannot see what you are presenting, you can find what you’re sharing in the Participant list (the icon of people in the upper right hand corner of your screen).
Pay attention!
This may go without saying, but because no one is “watching” you when you’re in an online class, you may be tempted to multi-task and/or let yourself get distracted. Fight that desire. In the long run, you will thank yourself.
Exit the online class (end your Google Meet session)
Click or tap on the telephone icon to exit the session. Note that you can rejoin it if you click/tap on this accidentally-- there’s a “Rejoin” button that will appear.